
Most software for building maintenance asks you to change how you work before it does anything for you. You import data, configure modules, train the team, and three months later you’re still not sure it’s running.
Basementgrid works the other way. You can start with the vendor you already use, on the next job that comes up. Here’s what that looks like, from setting up your workspace to getting the vendor paid.
Step 1: Set up your workspace (about 3 minutes)

A building manager or a council member can create the workspace. You enter the estate details and set the approval threshold, which is the amount above which a work order needs council sign-off. Then you invite the council members.
That’s the whole setup. You don’t need to load your assets or build your vendor list first. You can add those as you go.
Step 2: Create your first work order
Create a work order for whatever needs doing, invite your existing vendor, and assign the job to them. Your vendor doesn’t need to be on Basementgrid already, and they don’t pay to use it.
If the amount is above your threshold, the work order waits for council approval. Council members get the request, see the amount and the vendor, and approve it. Nobody has to chase anyone on WhatsApp to find out whether the job was authorised.
Step 3: The vendor dispatches a technician
Once the work order is issued, the vendor manager invites their technician and dispatches them to the job. The vendor runs their own side, so the building manager doesn’t have to coordinate who is turning up.
Step 4: The technician does the job, and proves it
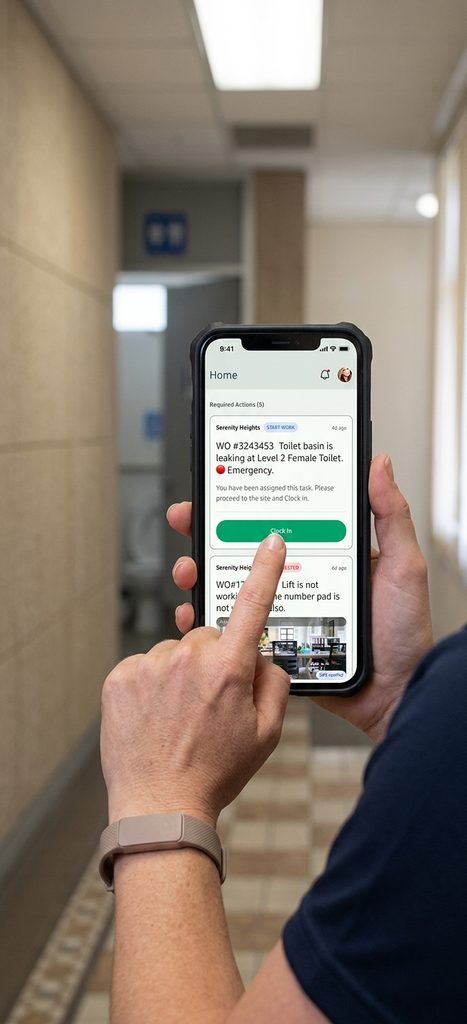
When the technician arrives on site, they clock in with GPS verification. They do the work, take photos that are also GPS verified, write a work summary, and submit the form.
The photos have to be taken on the spot, so you’re not relying on a picture sent later that could be from anywhere. The building manager gets a record of who was there, when, and what they did, without having to be on site.
Step 5: Accept the job
After the technician submits, the building manager reviews the work and accepts it. The invoice comes only after that, so you’re never paying for something you haven’t checked.
Step 6: Invoice and payment
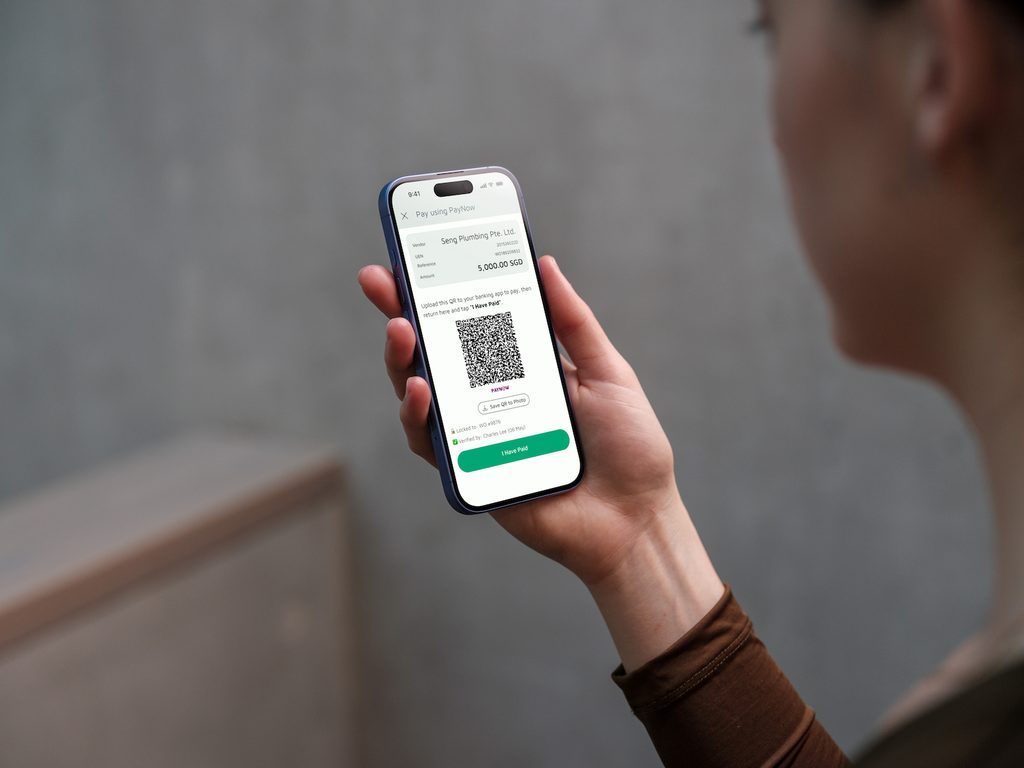
Once the job is accepted, the vendor manager submits the invoice. Basementgrid generates a PayNow QR code for it.
Whoever makes payments for the MCST account can use that QR code to create the payment record in the bank, and then approve it. The second approver approves it after that. Most MCSTs need two approvers, and the process fits that. The QR code just means nobody is retyping the vendor’s details or the amount.
The work order stays on file
When the work order is completed, it’s filed and tagged to the asset it was for, whether that’s a lift, a pump or a fire panel. The building manager and council members can go back to it later.
That matters when the council starts asking whether to keep repairing something or replace it. Instead of relying on someone’s memory or a box of old invoices, you can pull up every job done on that asset, what each one cost and who did it. It also stays with the estate when the managing agent or building manager changes.
Why this counts as plug and play
You didn’t migrate anything. You didn’t wait for an implementation. You set up a workspace, created a work order, invited the vendor you already work with, and ran one real job through the whole process, from approval to payment to filing.
Want more control?
If you want something more customised, such as a form the vendor has to complete before a job can be closed, you can set that up. The guides are at help.basementgrid.com.
If you’d like someone to walk you through it first, you can book a 15-minute demo.